Build a Custom MCP Server
On this page
Level: Advanced · Reading time: 14 min · Phase: 6 — MCP
In one line: Build a small notes server step by step: design narrow tools, validate input, expose notes as resources, add a prompt, test it and connect it to a host safely.
Before you start: MCP server, MCP tools and MCP resources. You should be able to read the message shapes for each.
Explain it like I'm new
Building a server is like writing a tiny API for an AI instead of a human. A human reads docs. The model reads your tool descriptions and schemas. So the craft is: few clear actions, strict inputs, small outputs.
You will build a notes server. A fuller, finished version lives in mcp-notes-server (persistence, search, tests and a Claude Desktop config). Read it after this walkthrough.
Words to know:
- Narrow tool: a tool that does one small, clear job, with no way to run arbitrary commands.
- Validation: checking every argument for type, length and allowed values before using it.
- Least privilege: give the server only the access it needs, such as one folder.
- Host config: the file where you tell the host which servers to start.
Watch it
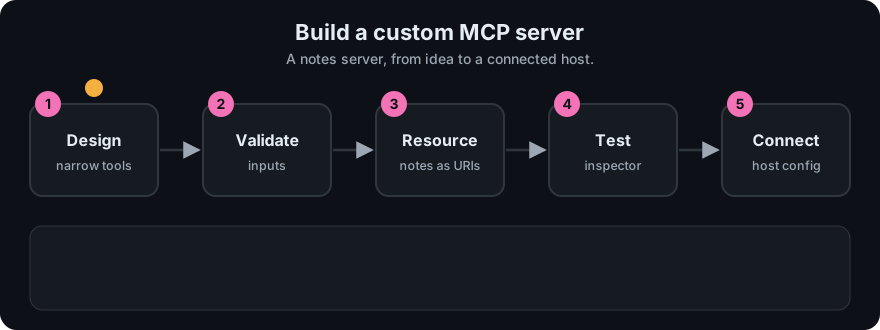
It plays on a loop. Read the caption in the box, one step at a time. Want to go at your own pace? Step through it with Previous and Next.
How it works
- Pick the job. "Let the model save and find my notes."
- Design narrow tools.
create_note(title, body),list_notes(),search_notes(query). No raw SQL, no shell. - Define schemas. Required fields, max lengths, types. Reject the rest.
- Choose storage. Start in memory, then a JSON file or SQLite. Keep writes inside one folder.
- Expose resources. Each note as
notes://{id}, so the app can attach it. - Add a prompt.
summarize_notesfor the user to trigger. - Pick the transport. stdio for local use.
- Test. Unit-test the logic and the JSON-RPC shapes (see below).
- Connect and review. Add to the host config, test with approvals on.
flowchart TD
  H[Host + LLM] -- stdio --> S[Notes MCP server]
  S --> T[Tools: create / list / search]
  S --> R[Resources: notes://id]
  S --> P[Prompt: summarize_notes]
  T --> D[(Notes file or SQLite)]
  R --> D
Worked example
The plan, as a story of one note.
- The user says: "Save a note called ideas with the text buy milk."
- The model calls
create_notewithtitle=ideasandbody=buy milk. - The server checks the title length and type. It rejects anything unexpected, then writes the note inside one folder only.
- The server replies
isErrorfalse with a short confirmation. - Later, the app attaches the note as the resource
notes://ideas, or the user triggers thesummarize_notesprompt.
Notice what is missing: no raw SQL, no shell command, no path from the user. Every step the model can reach is small and checked.
Code example
Step A: the real starting point. Copy code/hello-mcp-server. It already has registration, zod validation, annotations and stdio.
Step B: add a tool. Same SDK calls as the hello file; the storage is yours:
const notes = new Map<string, string>();

server.registerTool(
  "create_note",
  {
    title: "Create note",
    description: "Save a note with a title and body.",
    inputSchema: { title: z.string().min(1).max(100), body: z.string().max(5000) },
    annotations: { readOnlyHint: false, destructiveHint: false },
  },
  async ({ title, body }) => {
    notes.set(title, body);
    return { content: [{ type: "text", text: `Saved "${title}"` }] };
  }
);
Step C: report failures as results.
async ({ query }) => {
  const hits = [...notes.keys()].filter((t) => t.includes(query));
  if (hits.length === 0)
    return { isError: true, content: [{ type: "text", text: "No notes match." }] };
  return { content: [{ type: "text", text: hits.join("\n") }] };
}
Step D: add a resource and a prompt using registerResource and registerPrompt as shown in topic 05 and topic 06. Check the SDK docs for your version.
Step E: build and run.
cd 06-mcp/code/hello-mcp-server
npm ci && npm run build
node dist/index.js        # waits on stdin; logs only to stderr
Step F: test the protocol offline. Run code/mcp_mini_jsonrpc.py to see every message shape, and run its tests:
python -m pytest -q 06-mcp/codeStep G: connect. Use the claude_desktop_config.json from topic 03. You can also try the official MCP Inspector (see the docs).
In real projects (Python MCPServer, called FastMCP in mcp 1.x):
from mcp.server.mcpserver import MCPServer

mcp = MCPServer("notes")
notes: dict[str, str] = {}

@mcp.tool()
def create_note(title: str, body: str) -> str:
    """Save a note with a title and body."""
    notes[title] = body
    return f"Saved {title}"

@mcp.resource("notes://{title}")
def read_note(title: str) -> str:
    return notes[title]

@mcp.prompt()
def summarize_notes() -> str:
    return "Summarize my notes in five bullets."

if __name__ == "__main__":
    mcp.run()
Security checklist for your server
- Least privilege: the server only touches its own folder.
- Validate every input: type, length, allowed characters.
- No shell or SQL built from model text.
- Never print secrets; keep them in env vars.
- Remote server? Use HTTPS and the spec's OAuth-based authorization. Check the current spec.
- Assume tool output may be read by a model that can be manipulated.
When to use it / when not to
- Build custom when no existing server fits, or you must wrap private data.
- Do not build when a maintained server already does the job. Reuse it and review its code.
- Start with 3 tools or fewer. Add more only when needed.
Common mistakes
- One giant
do_anythingtool. - No limits on size, so one call fills the context.
- Writing to stdout.
- Skipping tests of failure paths.
- Letting note text act as instructions to the model. Treat stored text as data.
- Letting a tool take a file path from the model. Use an id or title, then build the path yourself inside one safe folder.
- Skipping tests because "it is only a small server". Test the logic and the message shapes before you connect it to a host.
Recap
If you remember only three things:
- Design a few narrow tools. Never expose a shell or raw database access.
- Validate every argument and keep writes inside one folder.
- Test the logic and the JSON-RPC shapes, then connect with approvals on.
Interview questions
- How would you design a notes server safely?
<details><summary>Answer</summary>Narrow tools, validated inputs, storage limited to one folder, read-only hints where true, approvals on writes, logs to stderr.</details>
- How do you test a server without an LLM?
<details><summary>Answer</summary>Unit-test the logic and send raw JSON-RPC requests (initialize, tools/list, tools/call), or use the MCP Inspector.</details>
- When would you move from stdio to Streamable HTTP?
<details><summary>Answer</summary>When many users or remote hosts need one shared server. Then add HTTPS and authorization.</details>
Go deeper
Prev: 06-mcp-prompts.md · Next: Phase 7 · Back to phase: Phase 6